We recently returned from a wonderful 3 week Japan family holiday, it was our first time and we all just loved it! We spent hours and hours working on the perfect 3 week Japan itinerary as we wanted to see and do as much as we possibly could.
Putting together a Japan itinerary with kids is no easy task. For one, there is a huge list of awesome things to do in Japan with kids, so trying to work out what to do and where to go in Japan with kids is a bit tricky. Also just trying to figure out which cities to visit, which order to visit them in, how to get between cities, how long to stay in each, which hotel to stay at and not to mention putting together a budget is extremely time-consuming!
If you’re travelling to Japan with kids soon and in the process of planning your own Japan travel itinerary, you’re going to find this guide super helpful. I have a lot of Japan content to come, but in the meantime, I wanted to start by sharing with you our detailed Japan 3 week itinerary so you might use it when preparing your own Japan trip itinerary.
We also travelled with friends who spent two weeks in Japan, so I’m also going to share with you their 2-week Japan itinerary in case that’s helpful too. Or check out this one week Japan itinerary.
So in this post, I’m going to tell you exactly where we stayed, what we did, how we got around attractions and between cities. I will also tell you exactly where we purchased things to make it super simple for you. Hopefully, you can use this information to assist in your own Japan travel with kids planning and benefit from the crazy number of hours it took me to put together our Japan 3-week itinerary.
So let’s get into it, the finer details of our 21 day Japan itinerary.
Need help planning your Japan itinerary? Click here to join our FREE 7 day Japan Itiernary Email Challange – you can unsubscribe at any time.
Talk to other families about their tips on visiting Japan and join our Thrifty Family Travel Facebook Group or be inspired on our Thrifty Family Travel Instagram Feed.
This post may contain compensated links. Please refer to my disclaimer here for more information.
- 3 Week Japan Itinerary with Kids
- Pre-Trip Tips
- Day 1: Fly to Tokyo
- Day 2: Explore Tokyo
- Day 3: Explore Tokyo
- Day 4: Explore Odaiba
- Day 5: Explore Harajuku
- Day 6: Disneysea
- Day 7: Tavel to Hakone
- Day 8: Explore Hakone
- Day 9: Travel to Nagoya
- Day 10: Legoland
- Day 11: Travel from Nagoya to Kyoto
- Day 12: Explore Kyoto
- Day 13: Explore Kyoto
- Day 14: Kyoto
- Day 15: Travel to Osaka – With a Stop in Nara
- Day 16: Universal Studios
- Day 17: Explore Osaka and Travel to Hiroshima
- Day 18: Day Trip to Miyajima Island
- Day 19: Visit the Hiroshima Peace Museum and Memorial Park
- Final Verdict
3 Week Japan Itinerary with Kids
I’ve done this as a Japan day by day itinerary, so if you like, you can do exactly what we did. Or you can just make changes here and there to fit your individual preferences.
This post is brief in detail about the attractions we visited; I have only provided the necessary information. Full details of all the attractions we visited and additional attractions to consider will be provided in future posts – stay tuned. The purpose of this post is to simply provide you with a Japan sample itinerary to work from, or you can just follow this day by day.
Pre-Trip Tips
Here are my tips on what to do before you jet set off on Japan family holidays:
Plan your Japan Travel Itinerary
Before leaving for our trip, we had our Japan trip itinerary fully planned out. There is a lot to see in Japan, and so by planning out our itinerary beforehand, we were able to ensure we made the most of our time while in Japan. Honestly, pretty much every day in Japan was jammed packed with activities.
Pre Purchase Attractions Via Klook
Where possible, we purchased tickets to attractions beforehand. Most tickets were purchased through Klook, which is absolutely fantastic as 9 times out of 10, we saved a stack of money. Below where I mention each attraction we visited – I will link to where we purchased our tickets so you can too if you like or click here to see what Japan attractions Klook covers.
Stay Connected with eSim or Pocket Wifi
We like to have access to the internet – it is an absolute must when you’re travelling with kids in Japan. We pretty much lived on Google Maps to get around the city as well as navigating the trains.
It’s also great for things like using social media, and if you travel Japan with kids, it’s great to let the little ones play games and stream Netflix when you’re on the long train rides between cities.
We’d like to share two great ways to stay online – the Pocket Wifi or an eSim. They are both slightly different in the way they operate. I will explain the pros and cons so you can decide which might be best for your trip.
eSim by Frewie
One of the main benefits of the eSim is that it is sent via email immediately, so it should be almost instant.
You can purchase an eSim for a duration of 5, 8, 15 or 30 days. The more days you purchase, the better value the eSim.
Your next choice is whether to go for 500MB, 1GB or unlimited data. If you choose unlimited data you can then choose whether to get the first 5GB, 8GB, 15GBb or 30GB as high speed.
Each option alters the price, so it’s worth checking each option to see what works best for you and your family. On the subject of family, although the eSim will be installed on your phone (or whoever deals with the tech in your family!), you will still be able to share your hotspot so additional family members can connect to the internet through you.
The eSim needs to be activated within 45 days of receiving the eSIM QR email. Do check the small print as the eSim will not work with all models.
The main benefit of an eSim rather than Pocket Wifi is there is no extra equipment to carry with you. You don’t need to remember to pick it up in the airport and you don’t need to return it afterwards.
You can purchase an eSim from Klook here.
Pocket WiFi
Pocket WiFi is a device that you carry with you to connect to the internet. With the pocket WiFi you pick it up from the airport when you arrive and drop it back off at the airport when you head home – easy!
You can choose unlimited data with the first 3GB, 5GB or 10GB being high-speed, per day. Unlike the eSim which has a minimum duration of five days you can pay for just one day with the Pocket WiFi.
The main disadvantage of choosing the Pocket WiFi over the eSim is the maximum number of connected devices is five at a time. Using an eSim hotspot you can most likely share with up to ten other users (depending on your handset). The Pocket WiFi limit is only an issue if you need to share with six people or more simultaneously though.
If you decide to go with Pocket WiFi, it’s a good idea to insure it as you will be liable for loss, damage and breakage. You can pay extra to insure it at the time of purchase to give you that protection.
You can purchase pocket WiFi from Klook here.
Download APPs
So as I mentioned we used Google Maps all the time. Google Maps is awesome for working your way around the trains as it will tell you which entry/exit to use as well as which platform. Honestly, this was pretty much the only app I used for getting around Japan – definitely ensure you have it downloaded before your trip.
The other App you want to download is SmartEX App – we used this to book all our Shinkansen trains. The APP is great because you can see exactly how much each train is and what seats are available. For the most part, we just booked trains the day before or sometimes the same day – but just keep an eye on how busy the trains are to avoid not getting tickets on the train of your choice.
You will still need to pick up your tickets at the train station – either from the ticket machines or by going inside a ticket office. You can of course just book tickets when you arrive at the station, but we have heard of trains getting full and so we didn’t want to risk this.
There is also the option of purchasing the JR pass – whether or not the JR pass is worth it for you will depend upon your individual travel plans – for us it wasn’t. There are a couple of JR passes to look at, you can check them out here.
Day 1: Fly to Tokyo

Click here for our full guide on Tokyo with kids.
We live in Brisbane; yet flew from Gold Coast as we landed ourselves one of those cheap Jetstar fares where you get the return flight for free. All up for the 3 of us, we paid $945 AUD, which is pretty amazing! JetStar has these deals a few times a year, so be sure to sign up to their newsletter and Facebook page to be notified of when they have a deal on. Otherwise, if you’re from somewhere else in the world, just check Skyscanner for flights.
Pick Up Pocket WiFi
As mentioned above, a few weeks before our trip we had arranged pocket WiFi, which we picked up at the airport. We did have to go to a different terminal from where we arrived – but we found this really easy as everything is well signposted in Japan – so don’t stress. And everything is also in English too.
Bus from Narita to Hotel
Before our trip, we had also purchased tickets for the Limousine Bus, which takes you from the airport into Tokyo. We bought our tickets through Klook. Through Klook, tickets are cheaper at 3100 Yen ($34.99 AUD) per adult and 1550 Yen ($17.49 AUD) per child as opposed to 4000 Yen ($43.50 AUD) per adult and 2000 Yen ($21.75 AUD) per child. Click here if you want to book discounted tickets via Klook.
However please note that the bus doesn’t take you to your hotel, just a central point in the city, so from there we took an Uber to our hotel. So if you haven’t got it downloaded already be sure to download the Uber App. Uber is great for getting around if you don’t speak Japanese because your driver can see where you are going via the App.
The Limousine Bus isn’t cheap though, and I think next time I will just take the train to the city centre as I found it pretty easy to navigate my way around. If you want to do this option, it’s best to arrange your train card beforehand – see more about transport cards in day 2 below.
However some people get nervous about the bus when visiting Japan with kids and so arrange private transfers. Private transfers through Klook are around 19,990 yen ($224.79 AUD) for up to 5 people – a lot more pricey than the bus, but they will of course pick you up from the airport and take you directly to your hotel. Click here to book private car transfers with Klook.
Tokyo Accommodation
We stayed at the Sakura Cross Hotel Shinjuku East while in Tokyo. Tokyo is not a cheap place to stay and we found this hotel quite good value compared to what was on offer. We thought it to be the best hotel in Tokyo for family and central for all the Tokyo kids activities we had planned. For current pricing click here.
Our hotel was in a great location being between two train stations – Higashi-Shinjuku Station (500 metres away) and Wakamatsu-Kawada Station (550 metres away) – the former being the one we used the most which is also just one station away from the main Shinjuku Station. Our hotel also had various 7/11’s close by, as well as a laundromat and bakery.
We got in pretty late at night – but we all walked across to the 7/11 for some food for dinner (yes 7/11 has amazing Japanese food!!!) and also bought some breakfast so we were ready to go the next morning. When taking kids to Japan this is my number 1 tip for when you need food fast!
Day 2: Explore Tokyo
Here is a brief overview of how we spent our first full day of our 3 weeks in Japan:
Buying Public Transport cards
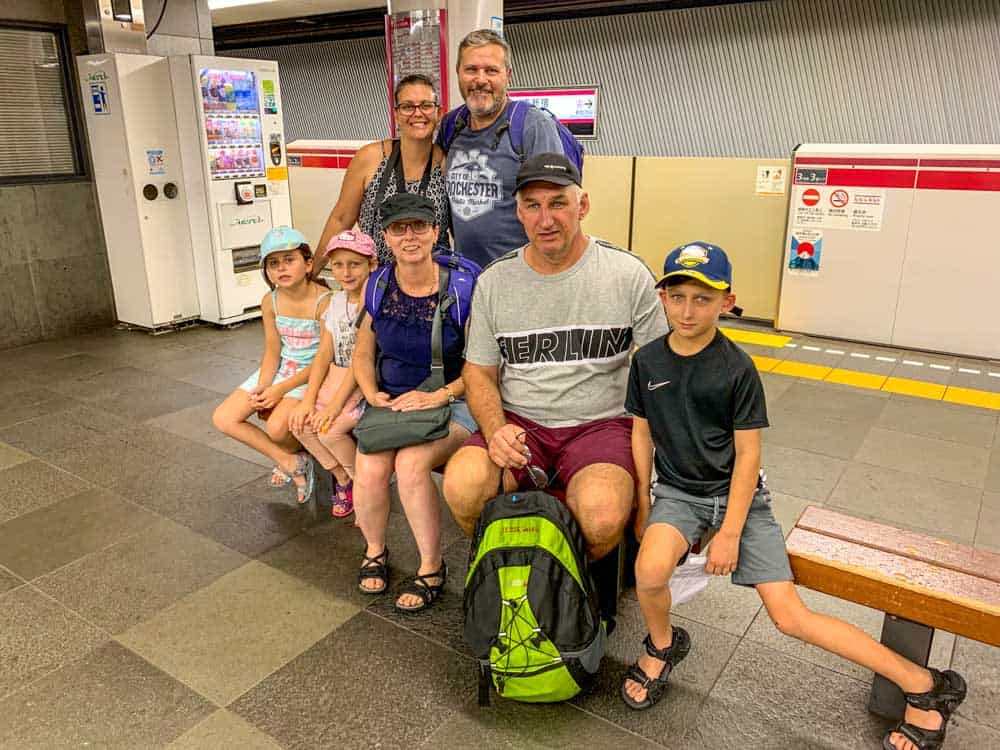
The first thing we did on our first full day in Tokyo was go to the train station and buy everyone in our travel group a Suica prepaid card – which is a card that you load cash onto so you can ride the trains and buses all around Japan. You MUST get one of these cards while in Japan – as trains are the main form of transport!
I’m not going to lie, this is a bit daunting to arrange – but you can do it! Just find a ticket machine inside the train station and find the button that says English and follow the prompts to purchase your cards. I understand that since we went in June 2019, there is now a tourist Welcome Suica Card which is a bit easier then what we had to do.
For our cards, we had to pay a deposit and then return them before we left to get a refund. Apparently these new cards come with a pre-loaded amount on them and expire within 28 days. The only downside is you can’t get any of the money back that is left on the card – so make sure you use it all up before you leave.
If you are on a family trip to Japan, you will need to have your children’s passports handy to be able to purchase the kid’s Suica cards. It’s quite funny actually as you push a button to say you’re buying kids’ cards and almost immediately a person pops their head out just above the ticket machine to see the passports.
Once you have your cards and loaded some cash on them you are ready to get on the train!
The trains may seem a little daunting at first – but once you get the hang of them, they are really easy. Google Maps is your best friend here as it will tell you what entrance to use and platform number. Everything is super organised in Japan – I just loved it! Plus there are heaps of signs at the stations and they are in English. If all else fails just ask someone – everyone is super friendly and helpful in Japan.
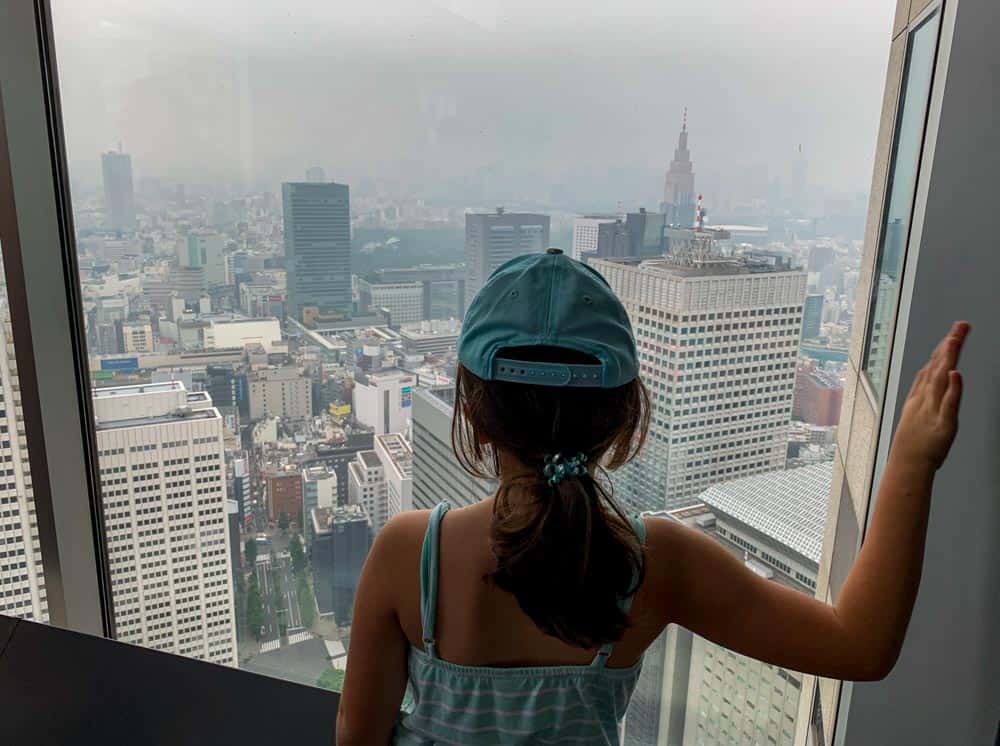
Tokyo Metropolitan Government Building
Once we all had our transport cards – we were ready to explore Tokyo!
- There are a few different towers in Tokyo for great views across the city, but the Tokyo Metropolitan Government Building is the only one that is free!!! If you are looking for free things to do in Tokyo with kids then this is top of the list.
- Given this is a free attraction – do get there early and do expect a bit of a line-up. When we arrived soon after 9am, there was already a huge line-up – but surprisingly it went pretty fast.
- We spent about 90 minutes here including lining up for around 30 minutes.
Puroland (Hello Kitty Land)
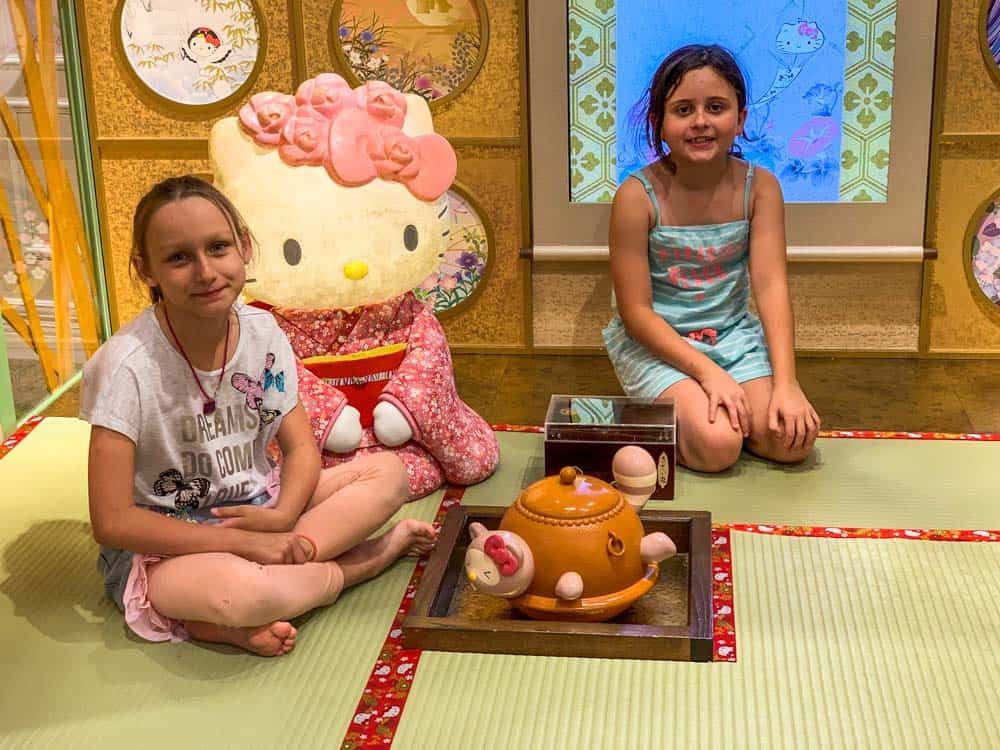
- After the Tokyo Metropolitan Government Building, we took the train to Puroland.
- We spent about 2-3 hours here, we probably could have stayed another hour or so, but we were short on time.
- For what it’s worth, the adults just didn’t get this place, but the kids seemed to love it – so definitely somewhere to go on your Japan trip with kids.
- Price: Ticket prices vary depending on the day and time you go, with adult tickets averaging 4300 Yen ($46.75 AUD) and kids averaging 2800 Yen ($30.45 AUD). We prebooked our tickets with Klook who currently sells discounted tickets for 2000 yen ($20.99 AUD) per person which is a huge saving! Click here to purchase your discounted Puroland tickets.
Day 3: Explore Tokyo
Here is a brief overview of how we spent day 3 of our Japan 3 weeks itinerary:
Fukagawa Edo Museum
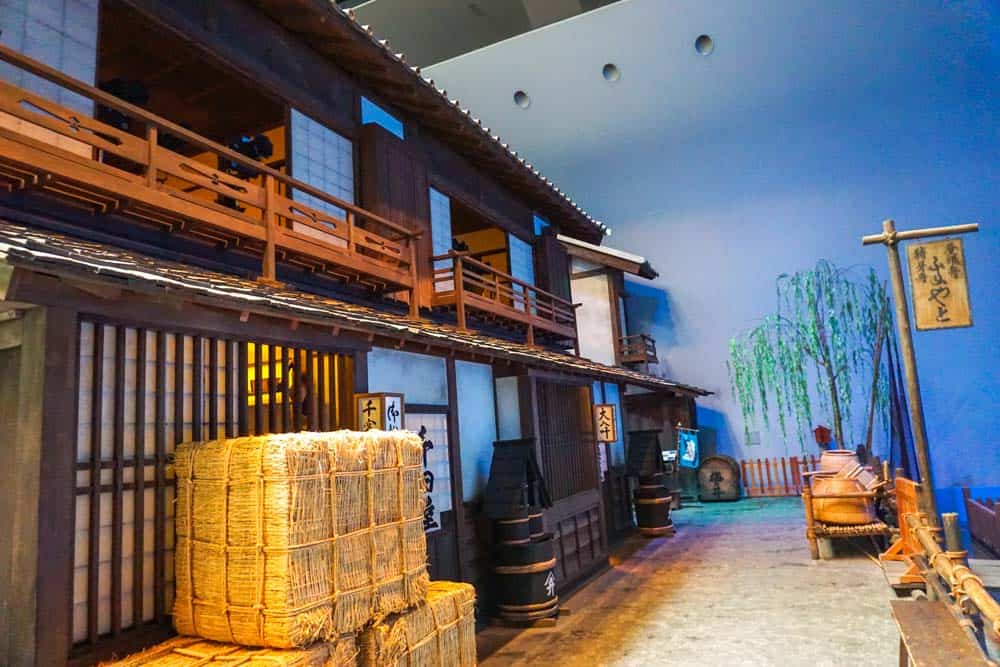
- From our hotel, we took the train to Fukagawa Edo Museum which is a lovely museum that has a replica Edo village set up, which via a tour guide you are encouraged to explore.
- We spent an hour or so here.
- Tickets can be purchased at the museum or at ticket handling facilities or online and are 600 yen ($6.50 AUD) per adult and kids 50 yen ($0.55 AUD). One of the cheapest Japan family tours you’ll find!
Asakusa
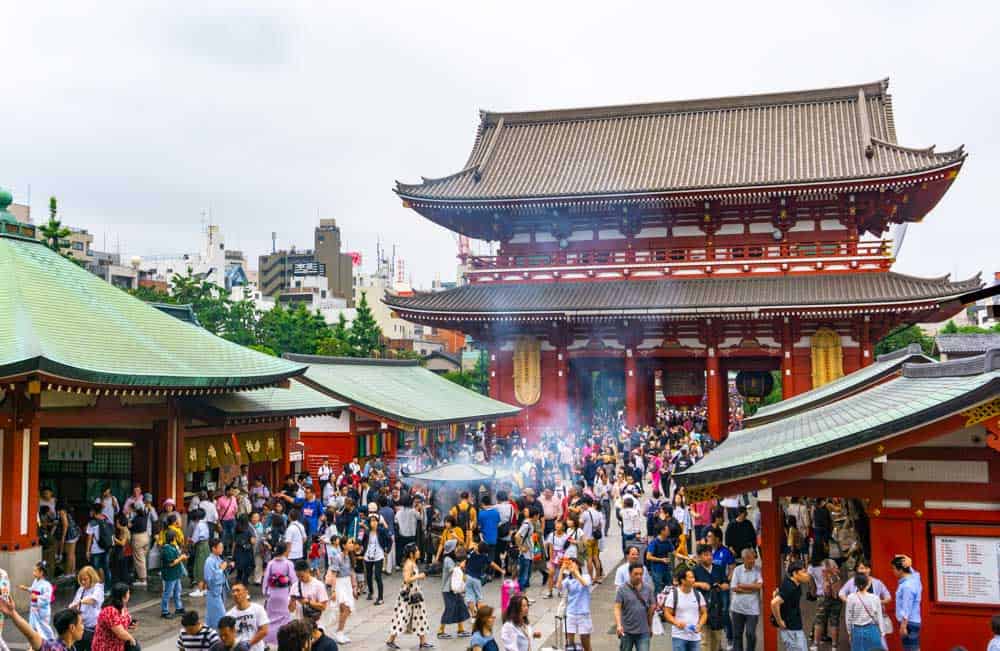
- We then took the train to Asakusa which is a nice tourist area with shops, restaurants as well as a few attractions.
- Here we had lunch as well as visited Denbouin Street – Old Edo Street, walked by Hanayashiki Amusement Park (Japan’s oldest amusement park), looked at the shops and spent an hour or so exploring Sensoji Temple (with everyone else in Tokyo it seems – note go early in the morning or late afternoon to avoid the crowds).
- We had also planned on visiting Uneo Zoo and Park which is close by, but after reading some poor reviews about the zoo we decided to skip it.
- If you had more time then us, you could plan on spending the entire day just in this area on your family holiday to Japan.
Shibuya

- We then took the train to Shibuya Station, which is the busiest train station in Japan! Boy they aren’t wrong.
- We checked out the Hachiko Memorial Statue which is right outside the station.
- We then went up to the rooftop of the Magnet Shopping Mall building to get a bird’s eye view of the world-famous Shibuya Crossing. It’s free to do so.
- We then walked across the Shibuya Crossing… which is just mental – but an iconic activity to do when in Japan, kids will be in awe!
- The kids spent a bit of their spending money at the 100-yen store (great place for them to by some Japanese souvenirs). This is a big shopping area, so if you want to shop, this is the area to do so.
- We then spent the afternoon at a karaoke booth where the kids all had an absolute ball singing… karaoke, of course, is another iconic activity you have to do on your Tokyo family holiday. It’s just one of the many family friendly things to do in Tokyo.
Piss Alley (Omoide Yokocho)
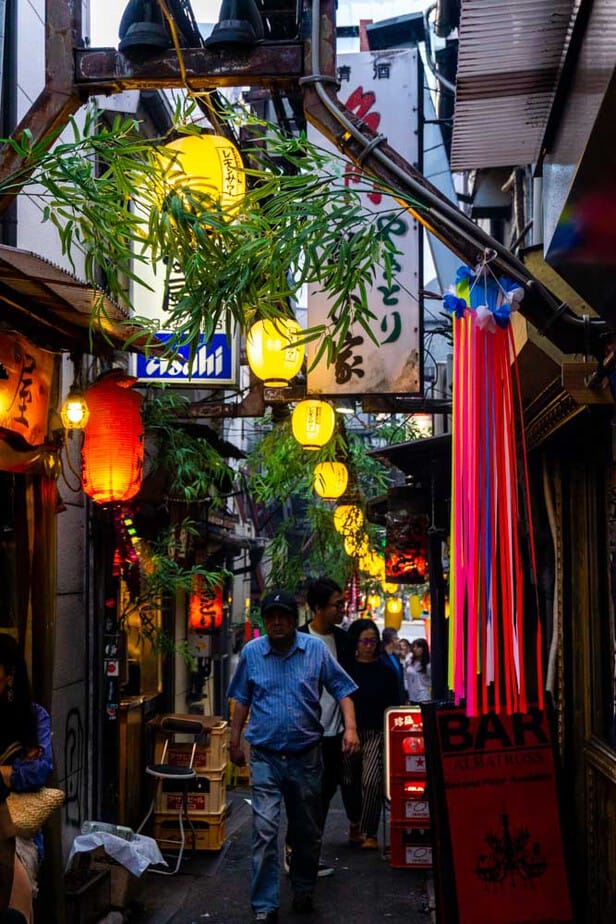
- We then took the train back to Shinjuku Station and checked out Piss Alley which is a cool little bar eatery lane nearby. Such a cool little area.
- We had hoped to eat dinner here – but the restaurants are super tiny and as a group of 7 we had no chance (something to keep in mind for larger families when you travel to Japan with kids) – but we found a place nearby for dinner.
- From here we took a train back to our accommodation.
Day 4: Explore Odaiba
Here is a brief overview of how we spent day 4 of our Japan family trip:
Mori Digital Art Museum/ teamLab Borderless

- From Shinjuku, we took the train to Odaiba and visited the popular Mori Digital Art Museum.
- This is an awesome place for kids so don’t miss it on your Japan family vacation.
- It’s super important to book this in advance (book here) as we heard from loads of people missing out. Tickets are 3800 yen ($39.85 AUD) per adult and 1300 yen ($14.99 AUD) per child (4-12).
- We spent around 3 hours here – we actually got hungry and left (you can’t go back in) – otherwise we could have spent much longer here.
Miraikan National Museum
- Take the free Tokyo Bay Shuttle bus to the Miraikan National Museum.
- We didn’t visit here as we were meeting friends and didn’t have time, but our friends we were traveling with who were doing a Japan 2 week itinerary, spent the afternoon here.
- Price is 630 yen ($7 AUD) per adult and 210 yen ($2.30 AUD) per child.
Odaiba Statue of Liberty
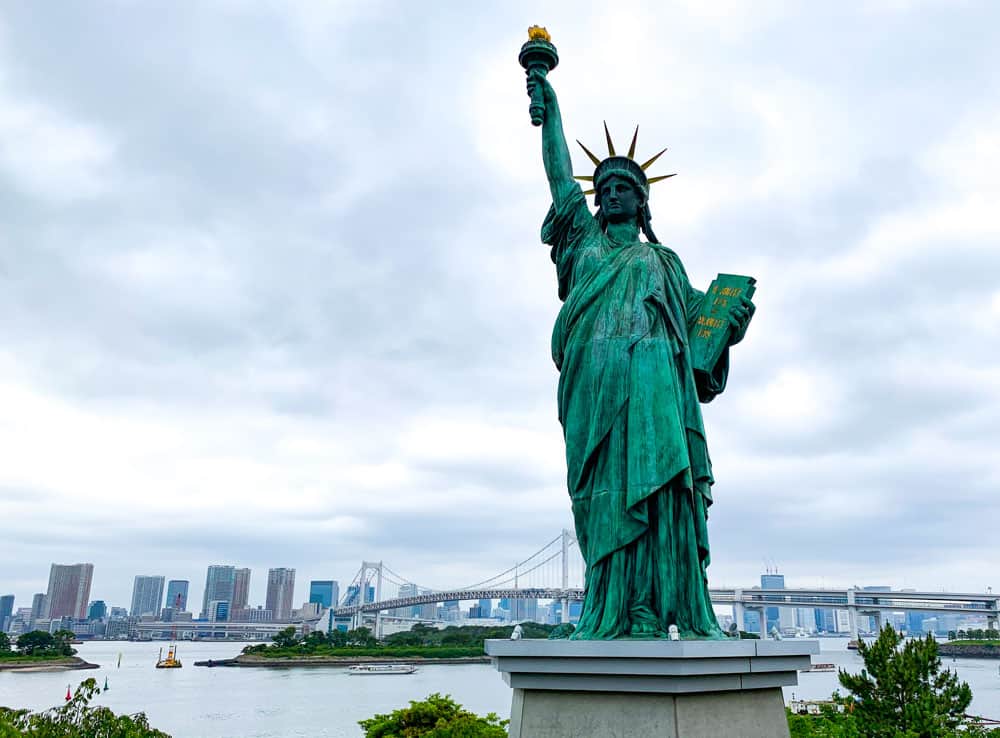
- Can you believe Tokyo even has it’s own replica Statue of Liberty!
- From teamLab Borderless we took the free Tokyo Bay Shuttle down to see the replica outside the Aqua City which is an indoor mall.
Day 5: Explore Harajuku
Day 5 of our Japan holiday with kids we had planned to spend the entire day exploring the area of Harajuku. Unfortunately, the weather gods had other plans and the day was pouring with rain. Nevertheless, we did get to do a few things:
HARRY Hedgehog Café

- First up we visited the very expensive and in my view overrated HARRY Hedgehog Café.
- Everyone must pay an entrance fee for this café and so we ended up just sending one adult (me!) with all of the kids, while the other adults went to a nearby café for a coffee. The kids however just loved the place – which seems to have happened a few times over our Japan itinerary, 3 weeks with quirky activities kids love!
- For 30 minutes at the café the cost is 1430 yen ($15.70 AUD) and worm snacks are additional – not for you, for the hedgehogs! Everyone must pay the entrance fee. You can pre-purchase tickets via Klook – but they are not any cheaper and are for one hour so cost 2640 yen ($29.79 AUD) per person – but they do include unlimited coffee and tea. Click here if you wish to pre book via Klook.
Takeshita-dori Street

- We then explored the famous Takeshita-dori Street, which is literally around the corner from HARRY Hedgehog Café.
- We had lunch here and also visited the Rainbow Sweets store where they make colourful fairy floss, ice cream and even colourful toasted cheese sandwiches. At this stage do you you even need to wonder; is Japan kid friendly? They will be in food-heaven!
- It was really pouring at this stage and so our plans of also visiting nearby Yoyogi Park or the Meiji Shrine were unfortunately called off. We also had planned on visiting Kiddy Land – but due to the rain, we went to a nearby shopping mall to spend the rest of the afternoon indoors.
Day 6: Disneysea

What the kids had all been waiting for on this family trip to Japan!!! A day at Disneysea!
We booked our tickets to Disneysea in advance via Klook and picked these up at the Maihama Train station before heading into the park. Tickets to Disneysea vary greatly pending day and time, ranging from 7900 to 10400 yen per adult ($80 – $110 AUD), and 4700 to 5600 yen for kids ($50 – $69 AUD), you can check the prices out here.
Many people choose to stay at a hotel near Disneysea and we had considered it, but rather than changing hotels etc we decided just to take the train. The train does take an hour or so, but it’s simple, reasonably cheap and if you’re trying to save money definitely just do this.
If however you’re travelling to Japan with toddler and need to have a break throughout the day, or if you plan on visiting both Disneysea and Disneyland, it’s probably best to stay at one of the hotels close by.
Day 7: Tavel to Hakone
Day 7 of our trip to Japan itinerary saw us say farewell to Tokyo and travel to Hakone where people go to get a glimpse of Mt Fuji.
Hakone Free Pass
We had pre-purchased a 3 days Hakone Free Pass which provided us with transportation to Hakone via the Odakyo line. The Hakone Pass is well worth it as it includes all your transport and various attractions. The 3 day pass is 6500 yen per adult ($74.85 AUD) and 1350 yen ($14.55 AUD) per child (6-11). If you only want the 2 day pass it’s 6100 yen ($63 AUD) per adult and 1100 yen ($11.50 AUD) per child.
We pre-purchased our 3 days Hakone Free Pass in advance via Klook. Klook don’t sell them at a discounted rate or anything – but you do accumulate loyalty points for your purchases – so might as well buy everything in the one place. Click here to purchase your Hakone Pass from Klook.
All up it took us about 3 hours to go from Shinjuku to our hotel in Gora.
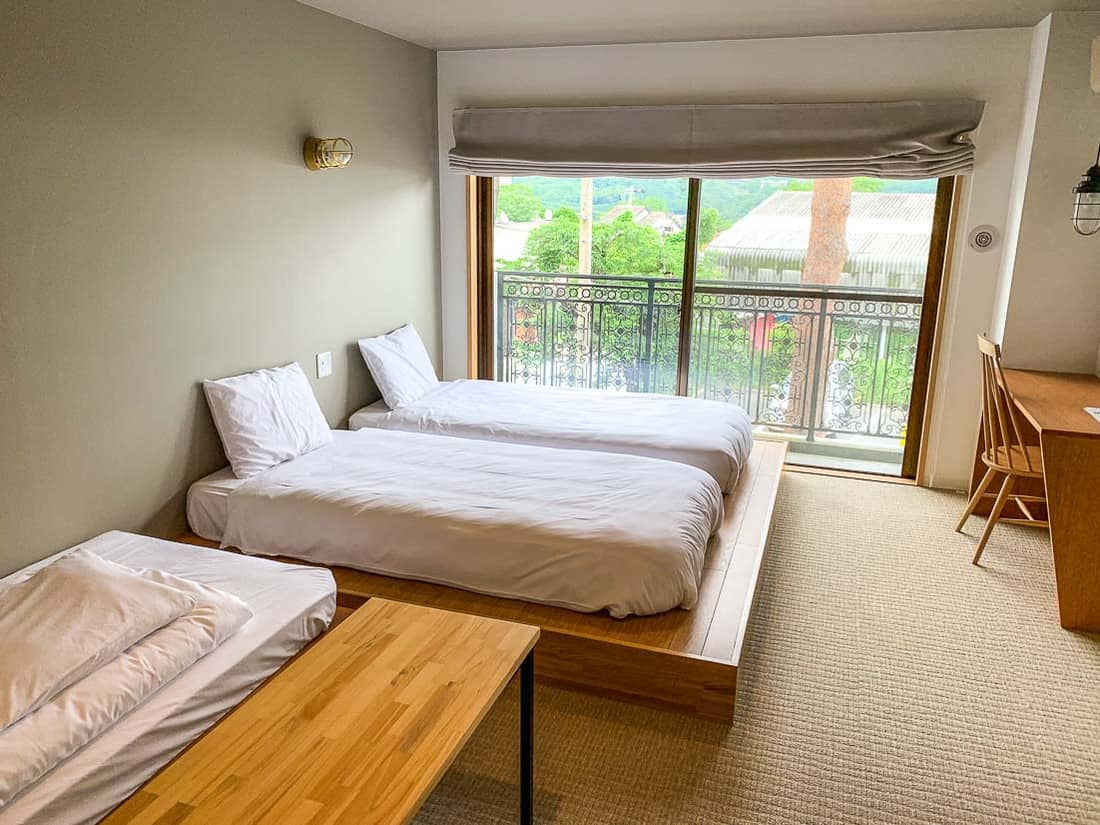
Hakone Accommodation
Our friends we were traveling with were doing a 2 week Japan itinerary, decided to spend their time in Hakone in a traditional Ryokan so they stayed at the Ichinoyo Shinkan. Here they had their own private onsen and wore traditional Japanese dress.
As we were doing a Japan budget itinerary we stayed in a private room in a hostel in Gora called the Emblem Flow Hakone. Click here to check current pricing for Emblem Flow Hakone or here for Ichinoyo Shinkan. Click here for our full guide on where to stay in Hakone with kids.
We spent the afternoon relaxing a little, but if you had some energy it’s definitely worth getting out and exploring some of the places included in your Hakone Pass to make the most of your three weeks in Japan
Day 8: Explore Hakone 
Day 8 we went off to explore the gorgeous Hakone – this place is beautiful and well worth spending a few days here. But if you’re short on time or doing say a 10 day Japan itinerary – you can still do a day trip from Tokyo which I’d also recommend.
Our plan was to take the Hokane Ropeway (cable cars) and stop at each section – unfortunately while we were there, there was quite a bit of volcanic activity and due to safety reasons, the cable cars were not running , so there was a bus in its place, but unfortunately it didn’t stop at any of the cable car stops.
Such a shame as I was so excited about doing it and from what I could see – the scenery is absolutely spectacular – so don’t skip this on your family holiday in Japan!!!
When the cable cars are running a one-way trip is 1500 yen ($16.95 AUD) per adult and 480 yen ($5 AUD) per child – or free for unlimited rides with the Hakone Pass.
Here is a brief overview of how we spent our first and only full day in Hakone:
Cruise on Lake Ashi
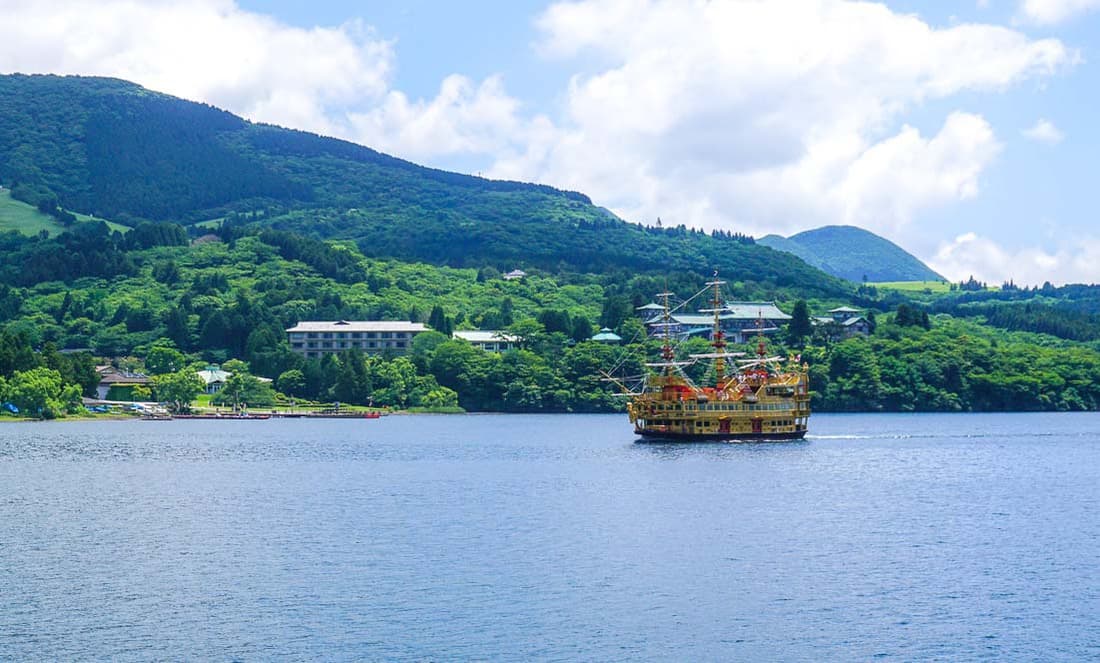
- The cable cars finish down by the stunning Lake Ashi which is also where the bus dropped us off.
- From here we used our Hakone Pass to take a cruise across the lake which was just beautiful. Such a change from Tokyo – I just loved Hakone!! The cruise takes around 30 minutes and is in a pirate ship! Family friendly Japan strikes again!
- The cruise is 1200 yen ($12.26 AUD) per adult or 750 yen ($7.97 AUD) per child – or free for unlimited cruises with the Hakone Pass.
Checkpoint Museum

- Once we got off the cruise we walked around to the Checkpoint Museum.
- We spent around an hour here and it’s also where we got our first glimpse of the gorgeous Mt Fuji!
- The Checkpoint Museum is 500 yen ($5 AUD) per adult and 250 yen ($2.50 AUD) per child. With the Hakone Free Pass you get a discount of 100 yen ($1.10 AUD).
Mishima Skywalk
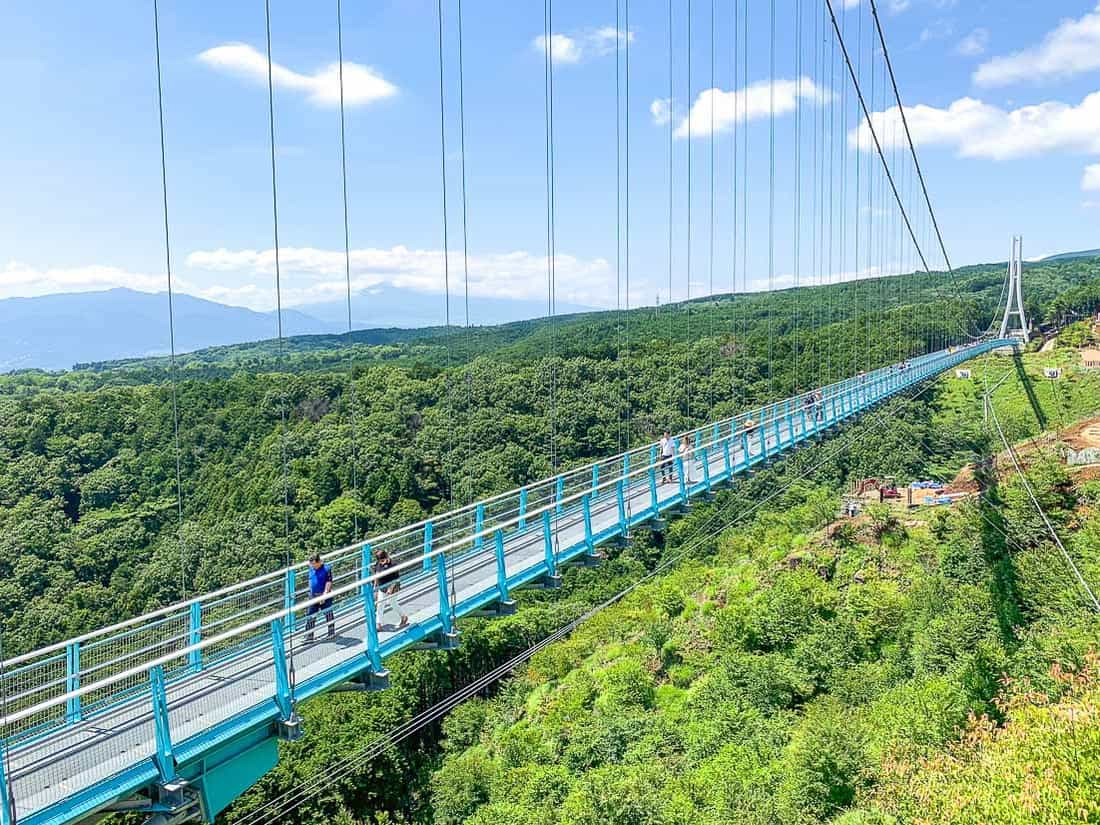
- From the Checkpoint Museum, we took the bus (which is included in the Hakone Free Pass) to the Mishima Skywalk.
- We spent about 30 minutes walking across the Skywalk.
- The Skywalk is 1000 yen ($10 AUD) per adult and 500 yen ($5 AUD) per child. With the Hakone Free Pass you get a discount of 100 yen ($1.10 AUD).
Hakone Kowakien Yunessun

- From the Skywalk we then took the bus up to the fun Hakone Kowakien Yunessun. Hakone is all about hot onsens right – you know the romantic type where you relax with your partner – but pop a kid in the mix and you’re best off going to Kowakien Yunessun – which is like a warm water park. It has warm pools, water slides and pools such as the coffee pool, red wine pool etc. There are both inside and outside pools.
- You could easily spend the entire day hanging out at the Kowakien Yunessun, but we just spent a few hours here.
- Entry is 2500 yen per adult ($27 AUD) and 1400 yen ($15 AUD) per child. You do get a small discount with your Hakone Free Pass.
- From here we headed back to our accommodation.
Day 9: Travel to Nagoya
Here is a brief overview of how we spent day 9 of our family travel to Japan:
Hakone Open-Air Museum

- In the morning we checked out of our hotel (left our luggage there) and went to visit the Hakone Outdoor Museum.
- The Hakone Open-Air Museum is surprisingly one of the wonderful places to visit when traveling to Japan with kids – Myla just loved the place. Plenty of interactive things for the kids to do here.
- We were short on time so only spent 2 hours here – but could have easily spent another hour or so.
- Entry is 1600 yen per adult ($17 AUD) and 800 yen ($9 AUD) per child.
Travel from Hakone to Nagoya
- We then made our way to Nagoya Legoland by train. The entire trip took around 3 hours.
- Apart from the Legoland Hotel, there is really no other option for a hotel so that’s where we stayed. The hotel is super expensive, so if you’re looking at where to stay in Japan on a budget – this isn’t it and does not meet our usual budget requirements – but I guess this was our splurge of the trip and it is super fun for the kids to stay in the Legoland Resort where absolutely everything is Lego themed, including the food! Click here to see the current pricing of the Legoland Hotel.
- Right outside the Legoland Resort there is a small area with cafes, restaurants and shops – they do close early though so if you don’t want to pay the expensive Legoland Dinner prices, go out for dinner early.
Day 10: Legoland
Day 10 of our Japan 21 day itinerary was all about visiting Legoland! Click here to read our complete guide to Legoland in Japan.
- Legoland is just metres from the resort, which is awesome if you’re on a Japan holiday with toddler or travelling to Japan with a baby as you can easily come back to the hotel for a rest in the middle of the day if need be.
- We spent the entire day at Legoland – Legoland is really great for younger kids. All the kids in our group loved it!
- Again we had pre-purchased our tickets through Klook. We did check booking our hotel with tickets but once again it worked out cheaper to get the tickets through Klook. Entry at the gate is 7600 yen ($82 AUD) per adult and 4500 yen ($45.80 AUD) per child (3-12). Klook are currently selling tickets for 4400 yen ($45 AUD) per adult and 3500 yen ($39.45 AUD) per child (3-12) so a HUGE saving!!! Click here to book your discounted Legoland tickets.
Day 11: Travel from Nagoya to Kyoto
Day 11 was all about traveling from Nagoya to Kyoto. This trip took about 1 hour.
Click here for our full guide on Kyoto with kids.
Kyoto Accommodation
In Kyoto we stayed in Kyoumachiya Inn Rakuoan (pictured to the right), which is a gorgeous little traditional Rykon in the back streets of Kyoto. This was a three-bedroom house and we shared it with our friends who were doing a 2 weeks Japan itinerary. Click here to check out accommodation options in Kyoto.
We spent the afternoon getting some groceries for our home in Kyoto as well as exploring the little narrow laneways around our accommodation.
Click here for our full guide on where to stay in Kyoto with kids.
Day 12: Explore Kyoto
Day 12 our friends who were doing a Japan 2 weeks itinerary – took the train to Osaka to spend the day at Universal Studios in Osaka – one of the great attractions in Japan for families. We were going to Osaka after Kyoto, but they were ending their trip in Kyoto. If you’re doing a Japan 14 days itinerary – this may be something you might also like to consider. See more details about Universal Studios below.
This is a brief overview of what we got up to on day 12 of our Japan trip with family:
Fushimi Inari Shrine
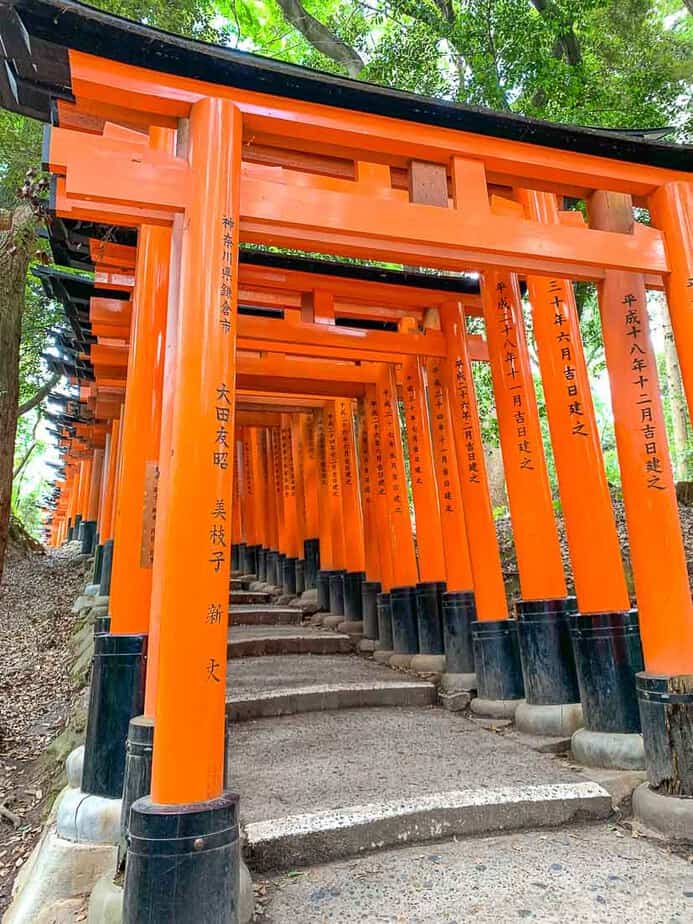
- We took the train to the Fushimi Inari Shrine – which is one of the most popular things to do in all of Kyoto and so not surprisingly the place was absolutely packed! If I had my time again I would come here super early in the morning or late in the afternoon to avoid the crowds.
- There are lots of walking tracks here and things to do around the temple so you could easily spend at least half a day here, however given we were short on time we only spent around 2 hours here.
- Entry is free.
Kinkaku-Ji Temple
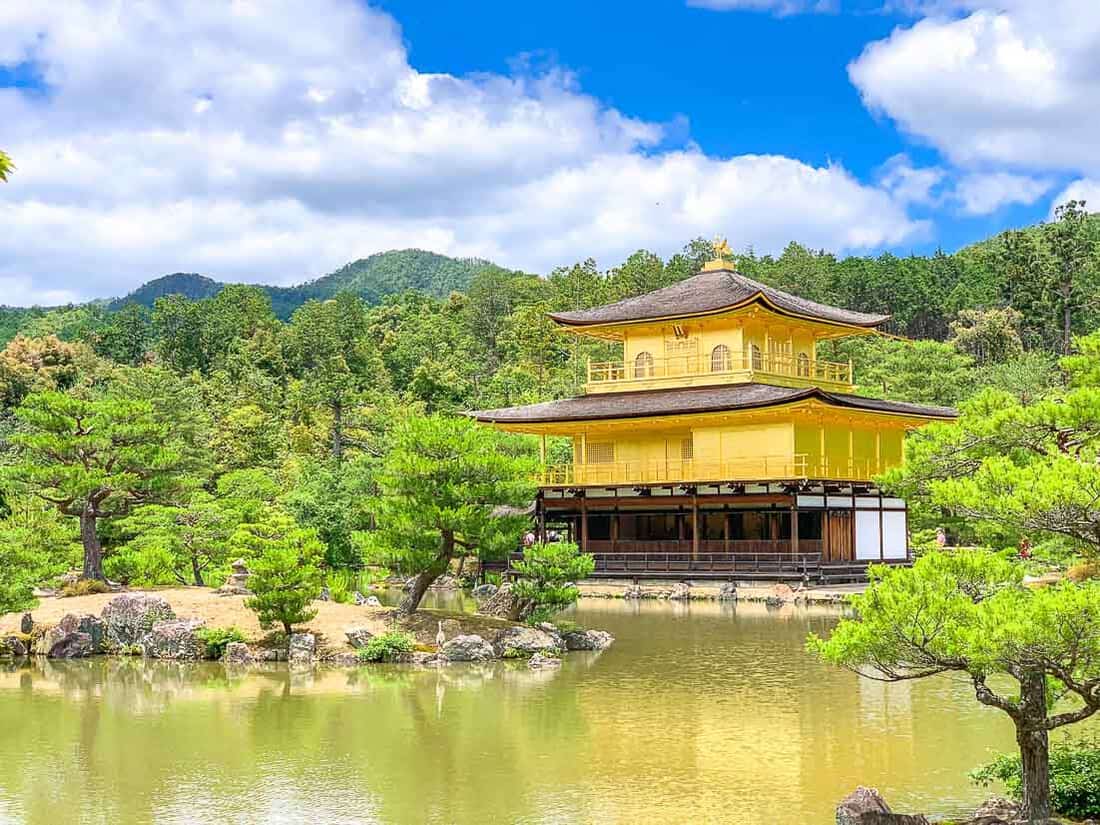
- We then took a train then bus to the Kinkaku-Ji Temple, also known as the Golden Pavilion.
- I have to say I was a little disappointed with this temple – sure it’s beautiful, but apart from looking at it, there isn’t much to do here. We were probably in and out within 30 minutes. If you’re short on time – give this one a miss.
- The Kinkaku-Ji Temple entry is 500 yen ($5.65 AUD) per adult and 300 yen ($3.25 AUD) per child (7-15).
Nishiki Markets
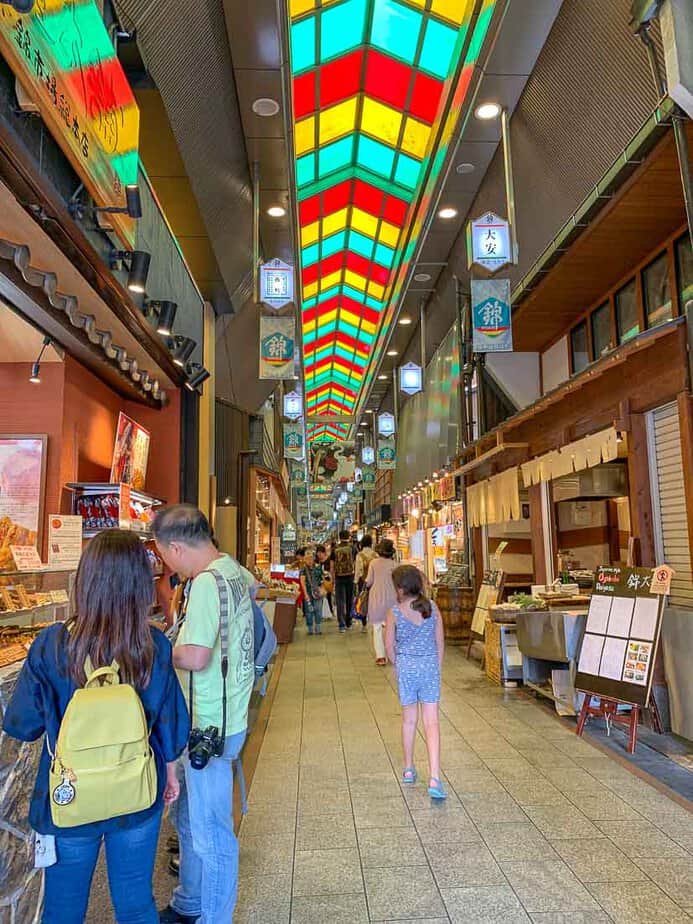
- From the Kinkaku-Ji Temple we made our way back to downtown Kyoto by bus and checked out the Nishiki Markets.
- For seafood lovers, you’re in for a real treat as there are lots of interesting things to eat. We just stuck with some ice cream though.
- We had also planned on visiting the Imperial Palace which is close to the markets – but we simply ran out of time and steam to be honest (so keep in mind if travelling to Japan with toddlers that little legs will get tired quicker), and so from here we walked back to our accommodation.
Pontocho Alley
- In the evening we headed out to the pretty little area called Pontoco Alley. This area is filled with bars and places to eat and is a must-do while in Kyoto.
- We found a lovely little place that served Shabu Shabu and then afterwards slowly strolled the narrow laneways before heading back to our accommodation.
Day 13: Explore Kyoto
Here is a brief overview of how we spent day 13 of our family vacation to Japan:
Nijo Castle

- We started the day by taking the bus to Nijo Castle. There is plenty to see here so we spent a few hours.
- Entry to the castle is 1300 yen ($13.30 AUD) per adult and 400 yen ($4.09) per child.
Arashiyama
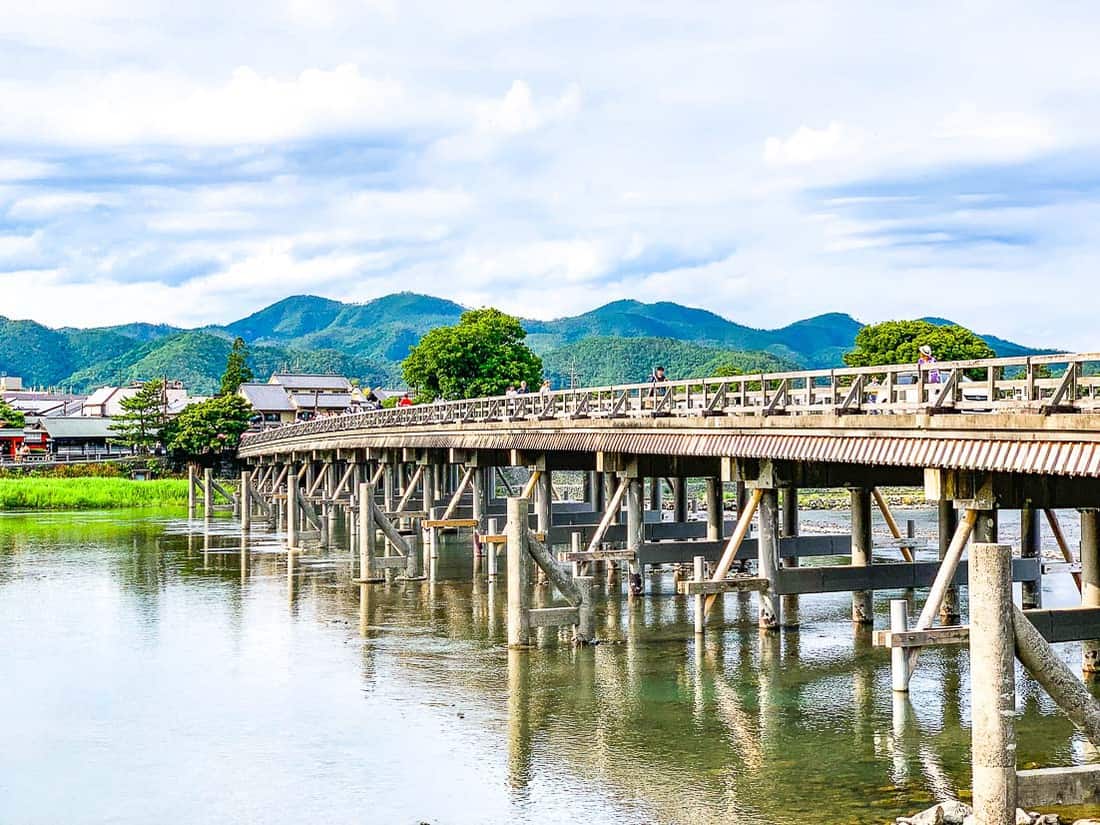
- From Nijo Castle we took a bus to the lovely tourist area of Arashiyama. I really loved this area, it was probably my personal favourite place in Kyoto.
- First of all we had lunch in Arashiyama and strolled around the shops for a bit.
- Then we walked to the Arashiyama Bamboo Grove which is just a short walk away from the main street. Entry to the Bambo Grove is free.
- We then walked across the lovely Togetsu-kyo bridge and over to the entrance of the Arashiyama Monkey Park – which was about a 15-minute walk. From here its a fairly steep walk up to the Monkey Park and takes around 30-45 minutes (depending on how often you have to stop due to tired children! – also keep this in mind if you’re travelling Japan with a baby and have to push strollers/use a carrier). It’s a little hard going and the kids did complain – but worth it once you get to the top and see the super cute wild monkeys. Entry to the Monkey Park is 600 yen ($6 AUD) per adult and 300 yen ($3.25 AUD) per child.
- We then took a bus back to our accommodation.
- Arashyiama is a great place and you easily spend the entire day here if you had more time. But we also found half a day was a good amount of time to see the highlights.
Maiko Dance
- Later in the evening, our friends went to check out the Maiko Dance which happens every night at 6.15 pm outside the Touzan Bar at the Hyatt Regency. We didn’t go simply because we were exhausted – but definitely put this on your list too for Kyoto itinerary with kids. It’s free to watch.
Day 14: Kyoto
Day 14 was the last day of our friend’s 14 days Japan itinerary and also our last day in Kyoto. Here is how we spent our last day in Kyoto:
Kiyomizu-dera Temple
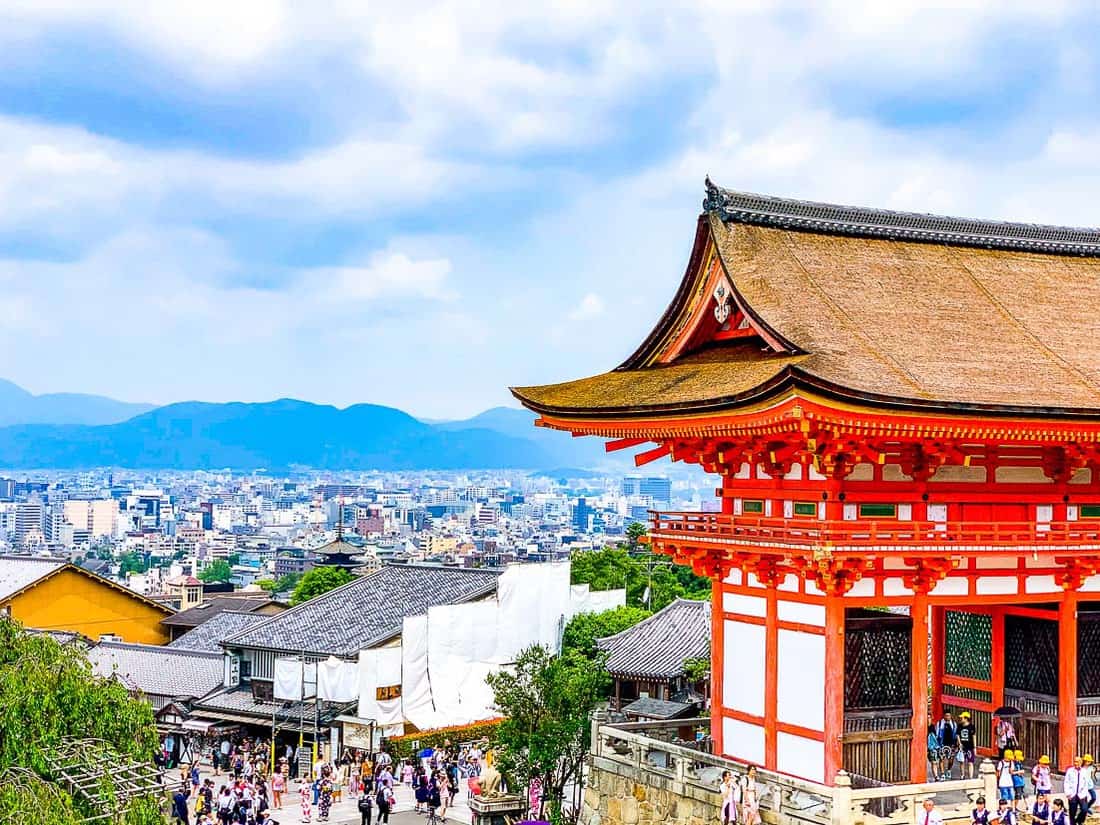
- From our accommodation, we took the bus to Kiyomizu-dera Temple. As you can see, from here you have great views across all of Kyoto.
- You can explore the grounds of the temple for free, but to enter it is 400 yen ($4.35 AUD) per adult and 200 yen ($2.20 AUD) per child.
- We spent around an hour or so here. You could spend longer exploring all the walking trails – but as usual, we were short on time. If you’re going to visit just one temple in Kyoto, I’d visit Kiyomizu-dera in Japan with family.
Gion District
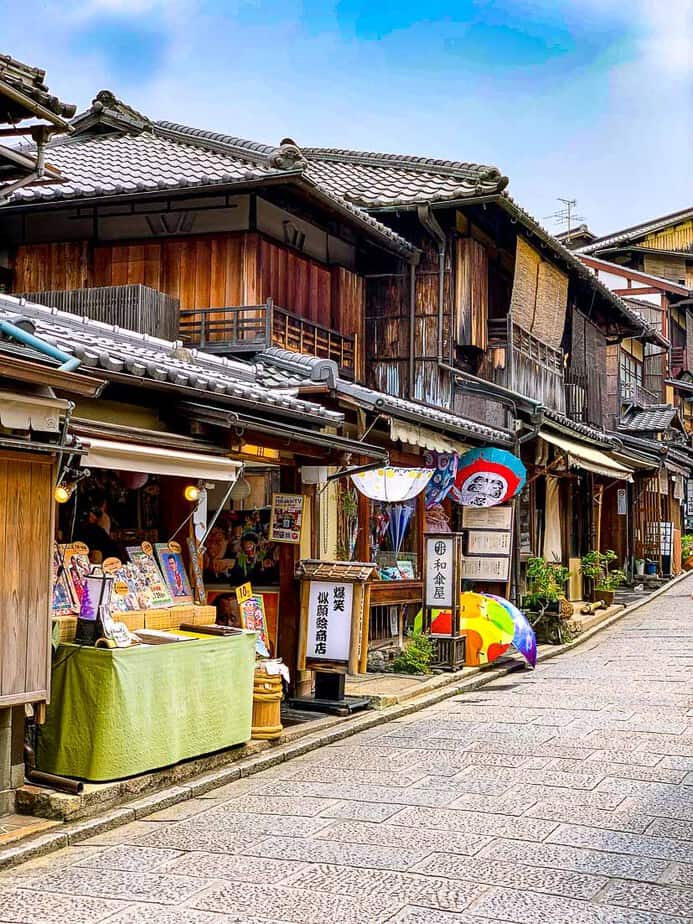
- From the Kiyomizu-dera Temple, we walked around the streets of the Gion District which are full of tourist shops, restaurants and cafes.
- Be sure to check out streets such as Ninen-zaka Street and Sannen Zaka Street for old traditional wooden houses.
- We had lunch in this area, which we found fairly expensive compared to anywhere else in Kyoto – but I guess that’s because there are a lot of tourists around here.
- We spent an hour or so slowly strolling through the streets and looking in the odd shop. If you are a shopper, definitely add this to your Japan trip planner, and you would probably spend a lot more time (and money) than we did!
Kodai-ji Temple
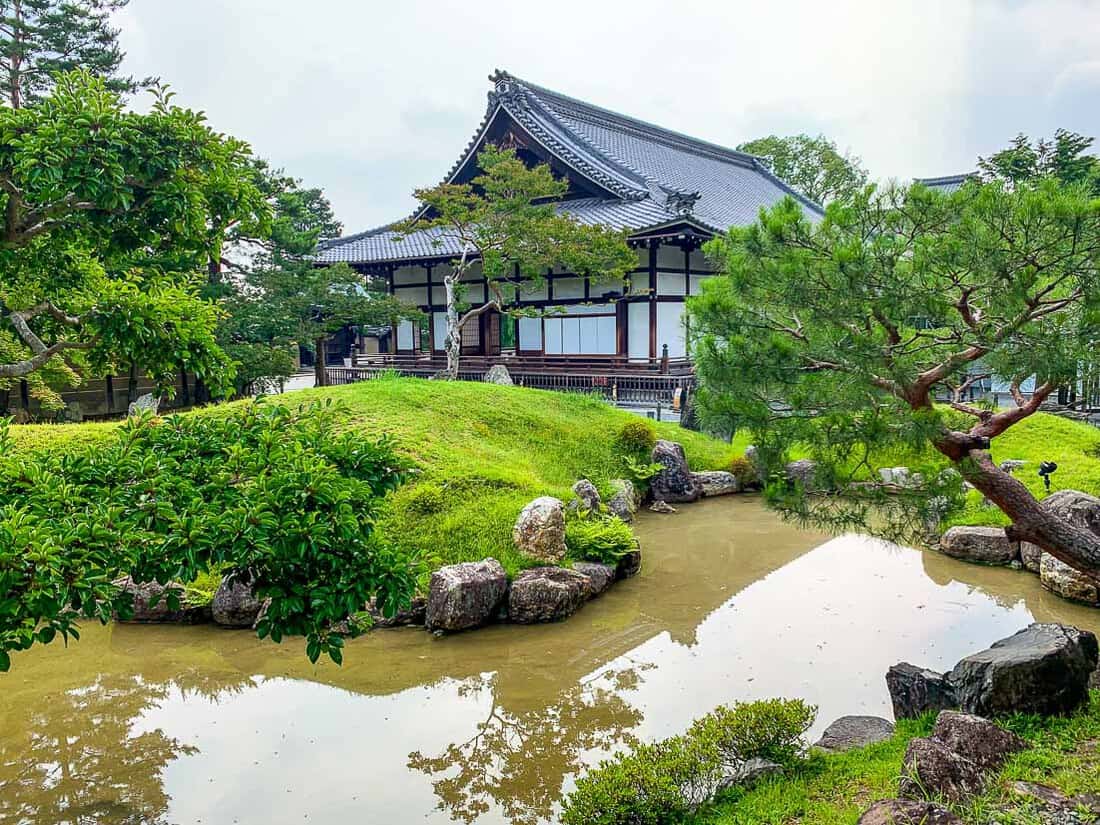
- From the streets of the Gion District, it’s just a short walk to the Kodai-ji Temple which I visited alone – I think most of the group were over temples by this stage.
- This is a really pretty temple, but reasonably small compared to some of the others. I spent around 30 minutes here – but given some of the group was waiting for me outside, I did walk quickly – I could have spent another 15 or so minutes here.
- Entry to Kodai-ji temple is 600 yen ($6.50 AUD) per adult and 250 yen ($2.70 AUD) per child.
Ryozen Kannon Statute
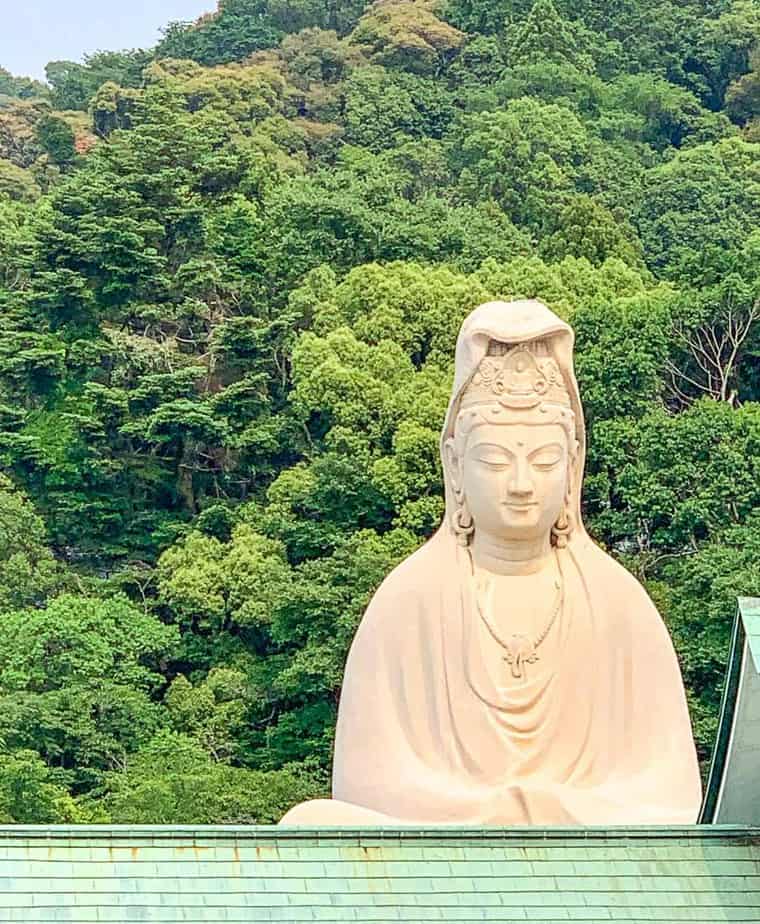
- From the Kodai-Ji Temple, I wanted to visit the Ryozen Kannon Statute – but I couldn’t for the life of me work out how to get into the complex. The statue is huge and I could see it, but just couldn’t work out how to get there. Plus the others in my group were tired and not that interested – so I took a picture and we moved on.
- If unlike me, you do work out how to get to the Ryozen Kannon Statute, entry is 300 yen ($3.25 AUD) per adult and 100 yen ($1.10 AUD) per child.
Day 15: Travel to Osaka – With a Stop in Nara
On day 15 we said good bye to our friends as their two weeks in Japan came to an end. They flew back from Osaka to Narita for their flight back to Australia.
Here is a brief overview of how we spent day 15 in Japan:
Nara Deer Park
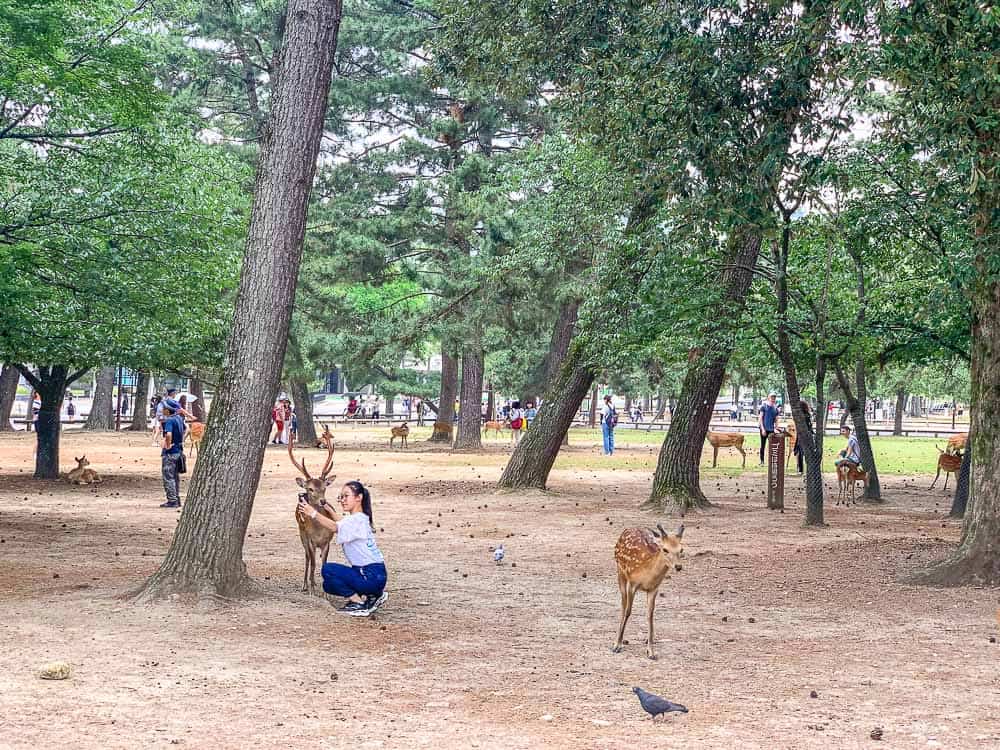
- On our way to Osaka we stopped off at Nara as we wanted to visit the Nara Deer Park.
- It was really easy to stop off on our way as the train station at Nara has large lockers that we could leave our luggage in while we visited the Deer Park – Japan family travel does have it’s conveniences!
- The Deer Park is free to visit and you can buy some food to feed the deer if you like. However I’d probably advise against this as the Deer are pretty pushy towards the people with food and it can be a bit scary for the little ones – even adults too!
- We then walked around Higashimuki which is the shopping area of Nara and had some lunch. I also wanted to see the guys pound the Mochi (sticky rice cake) in Nakatanidou, but by the time we had got there they were finishing up for the day. Check it out here. Pretty unique to see on your family holiday, Japan.
Osaka Accommodation
- We then continued our journey onto Osaka and checked into our accommodation.
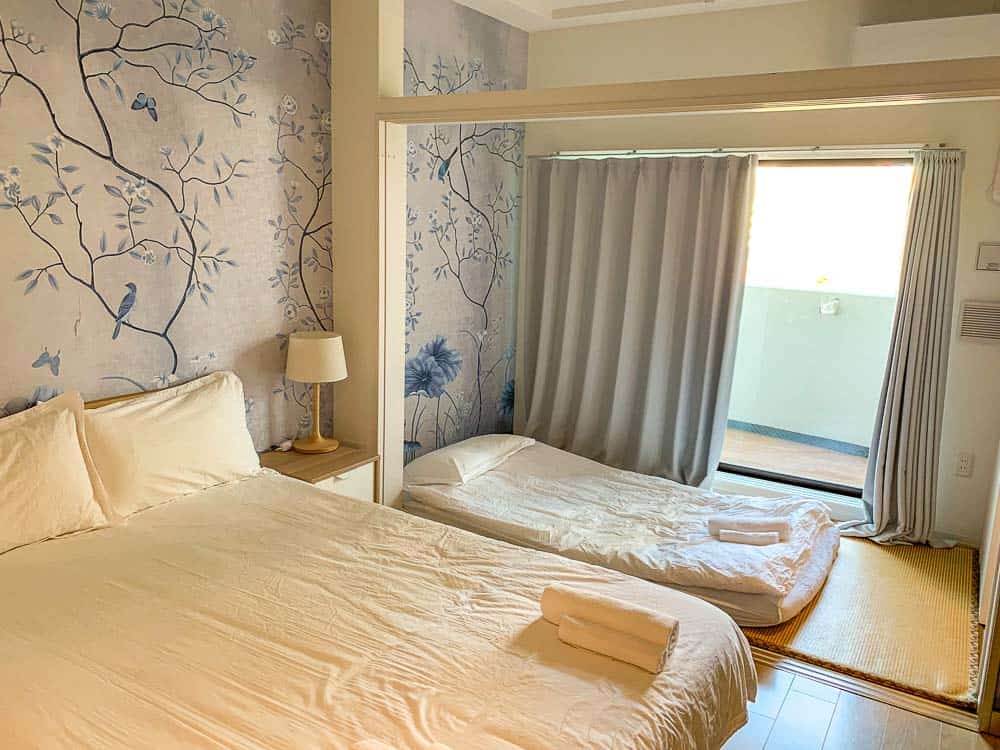
- In Osaka we stayed in Ostay Umeda DDC Hotel Apartment, which was a great self-contained studio apartment close to the Osaka – Umeda train station. Click here to check out a range of properties in Osaka for your Japan holidays with kids.
Click here for our full guide on where to stay in Osaka with kids.
Dontonbori
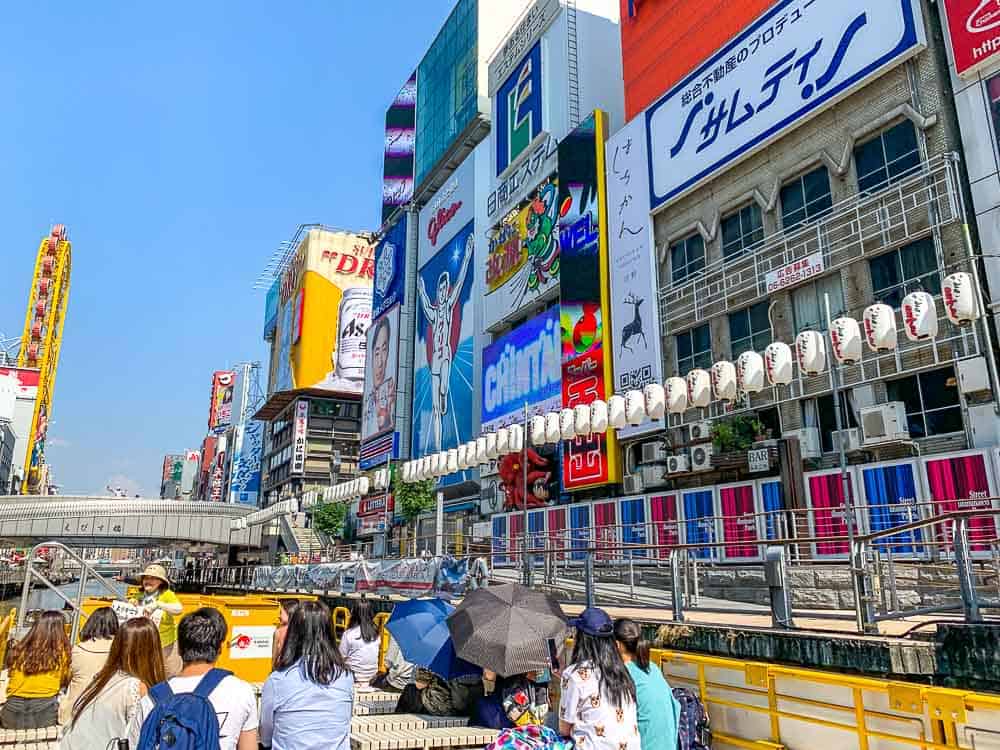
- We only had a super brief stay in Osaka, so no sooner had we dropped out bags, we headed straight to Dotonbori.
- In Dotonbori we took the 20-minute Tombori River Cruise. This provided a good brief overview of the area and also gave us an opportunity to see all the famous Dotonbori Billboards – can only imagine what this area must look like at night!
- The River cruises depart every hour and half hour and cost 1200 yen ($12.29 AUD) per adult and 400 yen ($4.35 AUD) per child (6-12).
- Dotonbori is also a shoppers heaven, with long shopping arcades absolutely everywhere. We’re not shoppers so pretty much bypassed this.
- We then took a stroll down to the older area of Dotonbori – Hozenji Yokocho. This area is where you will find sweet narrow laneways that head in the direction of the Hozenji Temple. I loved strolling around this area. The laneways are filled with small food shops and cafes. Too bad we didn’t have long here as I would have loved to have eaten in a few of these restaurants.⠀
- We then headed back to our accommodation in Umeda and headed out for dinner at a super cute Okonomiyaki place.
Click here for our full guide on things to do in Osaka with kids.
Day 16: Universal Studios
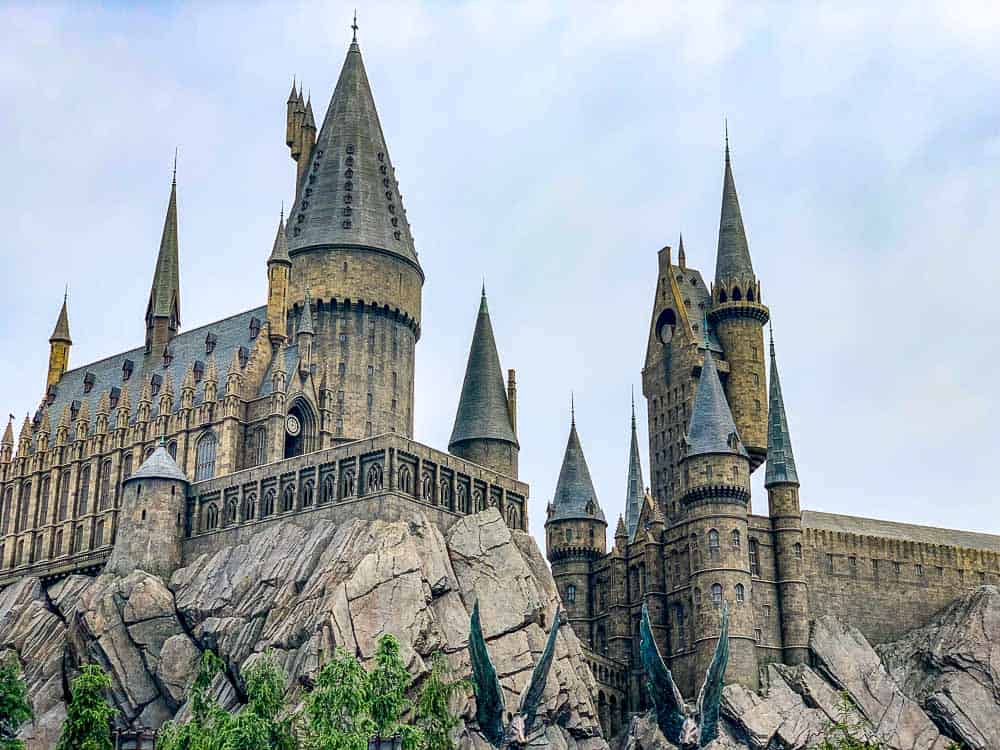
On day 16 of our Japan trip we headed to Universal Studios:
- We took the train to Universal Studios which was absolutely fantastic and we all loved it. There is plenty to do here for young and old – great rides and awesome shows too. I’ll provide further detail about Universal Studios in a separate post.
- Make sure you are at the park just before it opens as we found it much quieter at this time. And plan to spend the entire day here.
- Entry to Universal Studios is super expensive and there is a range of ticket options too. One day tickets start at 8600 yen ($97.22 AUD) per adult (12+) and kids are 5600 yen ($63.30 AUD) (4-11 – so if travelling Japan with a toddler, they’re free!). We pre-purchased our tickets via Klook. Klook don’t sell them at a discounted rate or anything – but you do accumulate loyalty points for your purchases – so might as well buy everything in the one place. Click here to purchase your Universal Studios from Klook.
Day 17: Explore Osaka and Travel to Hiroshima
Here is a brief overview of how we spent day 17 in Japan:
Cup Noodles Museum
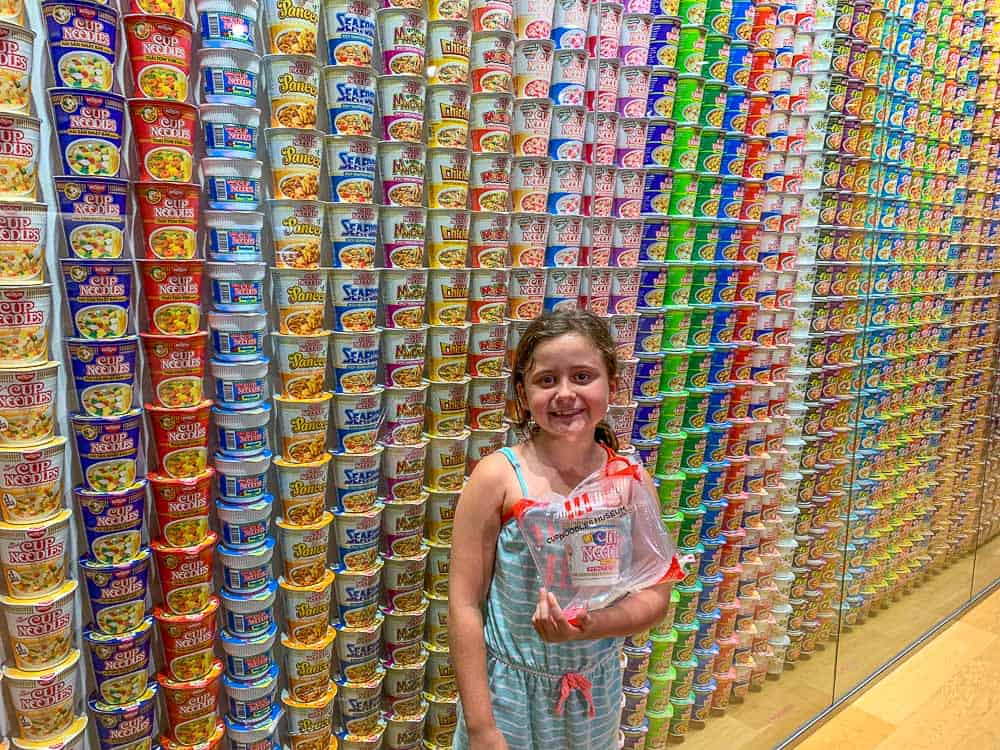
- In the morning we checked out of our accommodation and took the train to visit the Cup Noodles Museum. We left our luggage at the train station by Cup Noodles Museum.
- The Cup Noodles Museum is great for kids and well recommended. We visited on a weekend and it was packed, so I’d recommend getting there by opening hours or maybe it’s not so busy during the week.
- We spent around 2 hours here, but at least 30 minutes of this was lining up, so on a quieter day you could probably get away with less time here.
- Entry to Cup Noodles Museum is free, however if you want to create your own Cup of Noodles – which you should – it is 500 yen ($5.65 AUD).
Kids Plaza
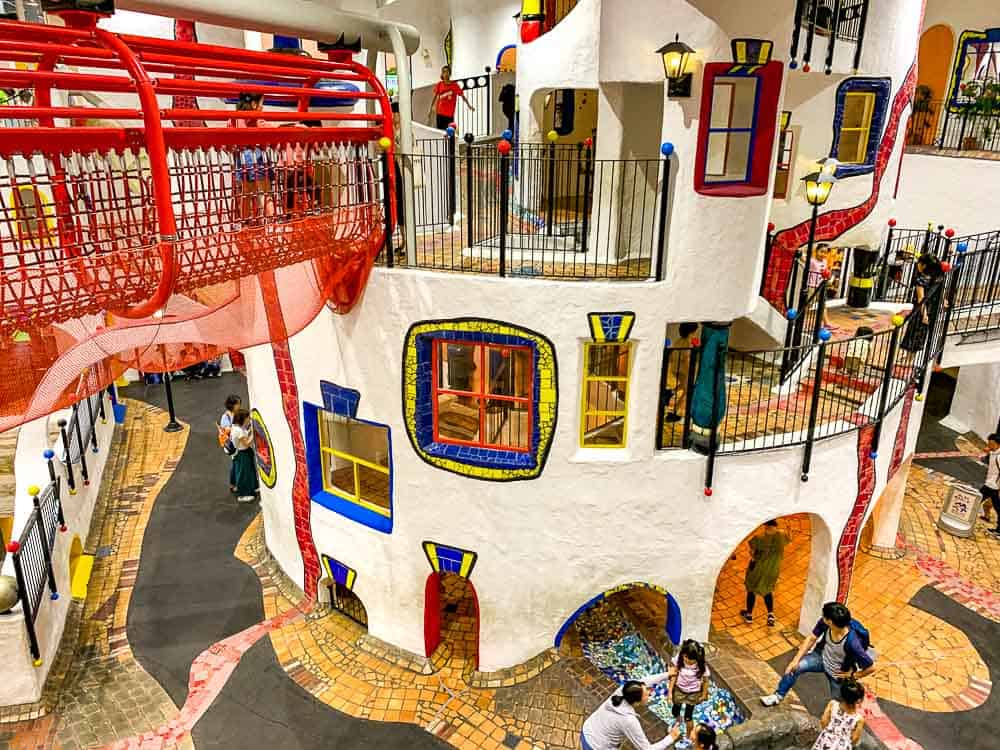
- We then took the train to Kid’s Plaza – which is basically heaven for kids! Kids Plaza is like a museum – but better! Across various levels – this place has a range of awesome things for kids to discover and play with.
- There is a huge playground the kids can climb, hide and slide in, as well as an area where the kids can try out a range of occupations such as shop keepers, firemen, and postman, as well as musical instruments, science equipment and heaps more.
- We spent around 2 hours here, but you could easily spend at least half the day – there is just so much to do here.
- Entry to Kids Plaza is 1400 yen ($15.25 AUD) for adults, 800 yen ($8.70 AUD) for school kids and 500 yen ($5.45 AUD) for preschoolers. Kids under 3 are free.
Travel to Hiroshima 
- We then said goodbye to Osaka and left for Hiroshima, the last destination of our 3 weeks in Japan itinerary.
- We arrived late afternoon in Hiroshima and checked in at our accommodation; Chidori Inn Fukuromachi Hiroshima. Our accommodation was surprisingly huge (well for Japanese standards) with a separate living area and sleeping area. Click here to check current pricing.
Click here to read our full guide on where to stay in Hiroshima.
Day 18: Day Trip to Miyajima Island
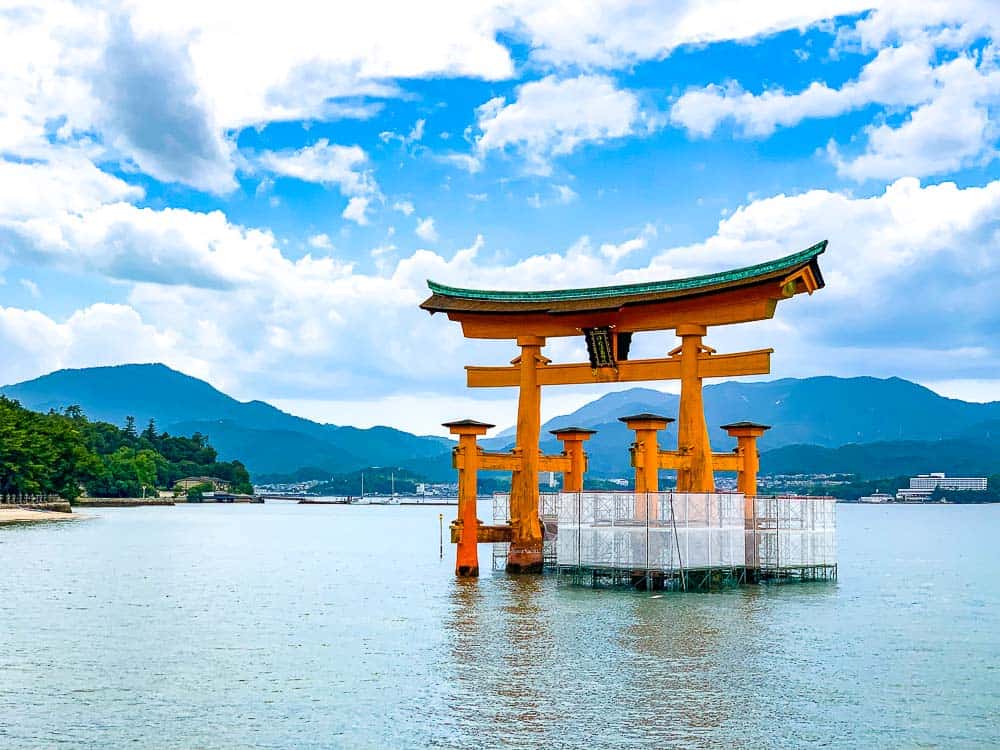
On day 18 we took a day trip from Hiroshima to Miyajima Island – one of my favorite places on this trip to Japan. I will explain more about what we did in another post, but here is a brief overview for your Japan family itinerary planning:
- We took the train from Hiroshima to the ferry and from here we took the short 10-minute ferry ride across to Miyajima Island. The return ferry trip is 360 yen ($3.90 AUD) per adult and 180 yen ($1.95 AUD) per child.
- We took the cable car up to Mt Misen – which was just stunning! Even the walk through the forest to get to the cable car was gorgeous. The cable car is 2000 yen ($22.60 AUD) return per adult and 1000 yen ($11.30 AUD) return for children. Many people take the cable car up and walk back down so one way it is 1100 yen ($12.45 AUD) per adult and 550 yen ($6.25 AUD) per child.
- We saw the Itsukushima Shrine – entry is 500 yen ($5.12 AUD) per adult, 300 yen ($3.07 AUD) per high school student and 150 yen ($1.53 AUD) for children 6 and older. As well as the famous Floating Torii, which as you can see from above was under construction during our visit.
- Visited the Miyajima History and Folklore Museum – entry is 300 yen ($3.25 AUD) per adult, 170 yen ($1.85 AUD) per high school student and 150 yen ($1.63 AUD) for kids.
- We walked around Omotesando Shopping Street.
- Saw the Hokoku Shrine – 5 Story Pagoda and Daisho-in Temple.
Day 19: Visit the Hiroshima Peace Museum and Memorial Park
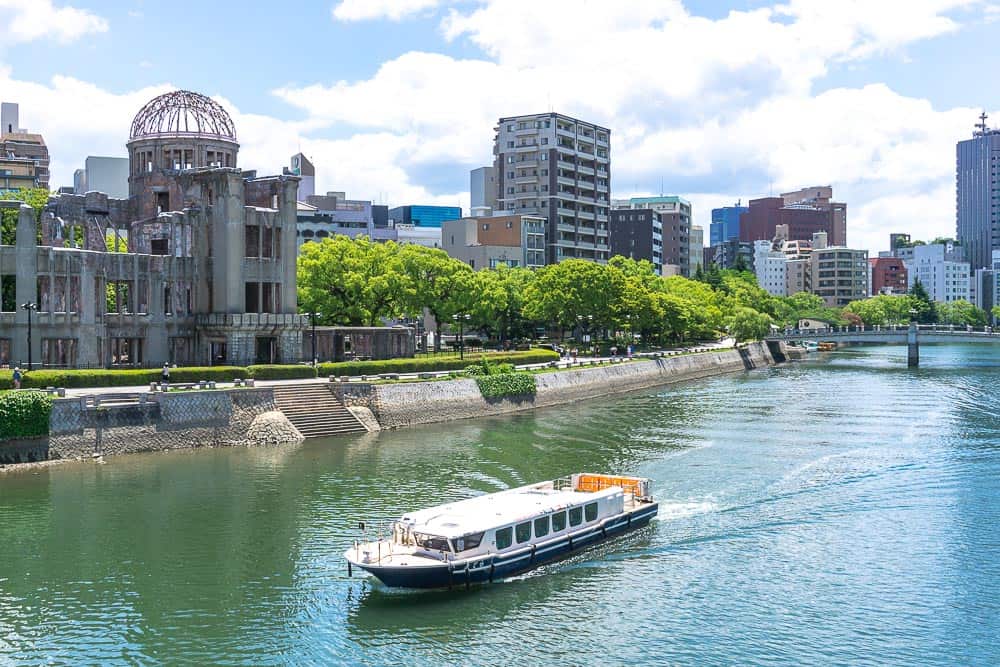
On our last day in Japan, we spent the morning at the Hiroshima Peace Museum and Memorial Park before returning to Tokyo for our flight home.
Hiroshima Peace Memorial Museum
- First up, we checked out of our accommodation and left our luggage in the lockers at the museum.
- For months and weeks before visiting, Andy and I were conflicted as to whether or not to go to the Museum as it would mean, of course, bringing Myla. In the end, we decided to take her and talked about what happened there in an age-appropriate way before arriving. We shielded her from some of the more graphic pictures and stories – but we spoke to her not only about the human suffering but also about the determination in the people to survive, rebuild, forgive and ultimately advocate for world peace.
- The Museum is fantastic, and we spent at least 90 minutes here – if I wasn’t with Myla, I could have probably spent even longer here – there is just so much to look at and to read.
- Entry to the Museum is 200 yen ($2.20 AUD) per adult, 100 yen ($1.10 AUD) for high school students and other children are free.
Hiroshima Peace Memorial Park
- Right outside the museum is the Hiroshima Peace Memorial Park. There is a range of different monuments to look at here including the Atomic Dome and the Children’s Peace Monument.
- The Park is lovely, and it’s definitely worth looking at all the different monuments here. We spent an hour or so here.
Travel to Tokyo and Fly Home
- Around midday, we then got our luggage and took a train back to Tokyo and onto Narita Airport. Later that night we caught a 9pm flight direct to Gold Coast and our Japan trip came to an end.
Final Verdict
We all thought our family trip to Japan was brilliant! There are so many great Japan activities for kids that you will definitely benefit from planning out you’re itinerary first – hopefully, you can use the information contained in this post as a sample Japan itinerary for your own trip. As you can see, a lot of work went into planning this trip – so if you’re planning a trip to Japan, why not save yourself some time and use this as a basis for your own trip to Japan.
____________________________________________________________________________________
We hope this ultimate itinerary in Japan has been helpful. For some of the best family hotels in Tokyo click here and if you plan on visiting Legoland find out all the inside info here and for all the best things to do in Japan have a look here.
And if you’re on Pinterest, save one of the image below for later.



This is awesome. Thanks so much.
Hi! Thank you. I’m interested in the 2 week itinerary please, where can I find that?
Looks wonderful 😉
Hi Lindsey – the 14 day itinerary is the first 14 days of the trip – this is what the friends that were with us did. We continued on for another week in Osaka and Hiroshima.
Hi Melissa, great itinerary and I’m using this as a basis for our own family trip next year. Is there anything you would have done differently? Spent less or more time anywhere? Gone somewhere else instead?
Thanks,
Hi Lauren – not really – but I have made some comments throughout the article about any suggestions or changes to the itinerary.
Can you advise on the budget of your 3 week trip?
I have listed prices throughout the article – so you’ll need to go through and add this up depending on how many people there are in your family. Will also of course depend on time of year as air fares and hotels change.